Updated 19 June 2026
I’m going to tell you something the big filter brands don’t want you to hear: if you’re throwing away your filter cartridges every month, you’re throwing away the health of your tank. I’ve spent 15 years maintaining everything from high-tech 20-gallon longs to my 50-gallon community, and I haven’t “changed” a filter in years — I maintain them. The logic is simple: your filter is a home for your Starter Bacteria. If you toss the house, you toss the tenants.
In this guide, I’ll break down which parts of your filter should stay, which should go, and exactly how to clean each one without crashing your cycle.
TLDR Fast Facts: Fish Tank Filter Maintenance
- The #1 Cleaning Rule: Never rinse any filter parts under a chlorinated tap. Always rinse, swish, and squeeze your media inside a bucket of old tank water during a water change.
- Your Filter Type Changes Everything: HOB and sponge filters run on the standard 2-4 week (mechanical) or 1-3 month (biological) schedule. Canister filters hold far more media and can comfortably stretch to 2-3 months between cleanings — opening one every few weeks is overkill.
- Coarse vs. Fine Sponges Aren’t the Same: Coarse sponges double as biological media and can go months, even over a year, between real attention. Fine polishing pads clog by design — expect to rinse or replace them at nearly every cleaning.
- The Filter Cartridge Trap: Never throw away your mesh filter cartridges every month just because the box says so. Tossing the cartridge destroys your beneficial nitrifying bacteria colony, crashing your cycle.
- How to Hack Cartridges: When the activated carbon inside a cartridge expires (after 2–4 weeks), cut a slit in the mesh, dump the old carbon out, and slide the floss back in. The floss lasts for months until it physically falls apart.
- Don’t Just Trust the Calendar: The 2-4 week carbon window is a guideline, not a guarantee. Watch for the smell or tint it was removing to return, or test your water directly — that’s the real signal it’s exhausted.
- Sponges & Foam Duration: Coarse mechanical sponges last 1 to 2 years. Only replace them when they completely lose their springy shape or begin to crumble.
- Ceramic Bio-Media & Wheels: Ceramic rings, bio-balls, and biological media wheels should never be replaced unless they physically break down into dust.
Disclosure: AquaLogicHQ.com is a participant in the Amazon Services LLC Associates Program, as well as other affiliate programs, designed to provide a means for us to earn fees by linking to Amazon.com and affiliated sites at no extra cost to you. Please see the Affiliate Disclosure for more details.
The Quick Reference: Fish Tank Filter Media Maintenance Schedule
If you are looking for the short answer, here it is. Use this table as a baseline, but remember that a heavily stocked tank (lots of fish) will require more frequent cleaning than a lightly stocked one.
| Media Type | What it Does | When to Clean | How Often to Replace |
|---|---|---|---|
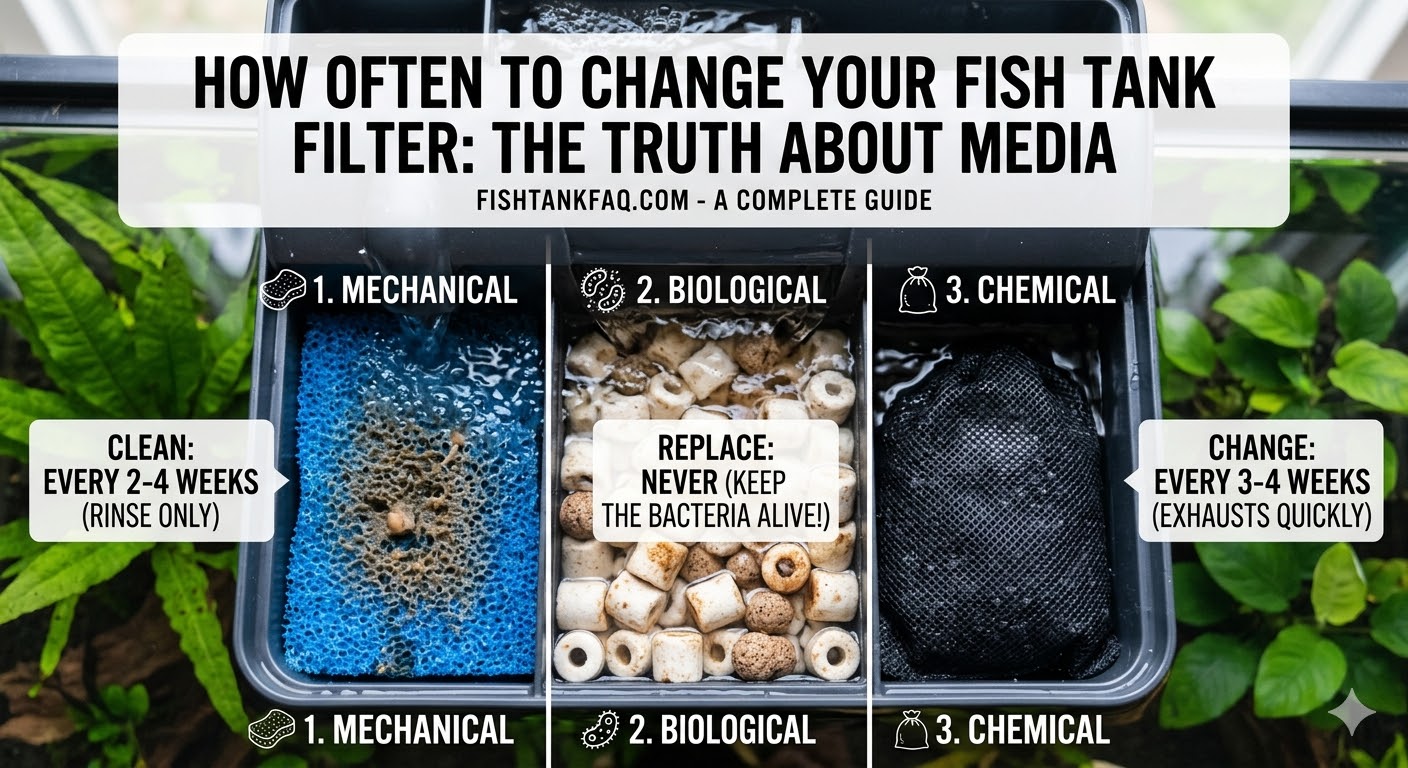
| Mechanical (Sponge, Filter Floss) | Traps physical waste and uneaten food. | Clean every 2–4 weeks, or when flow slows | Only when it loses its shape or starts falling apart. |
| Biological (Ceramic Rings, Bio-Balls) | The “home” for your beneficial bacteria | Clean every 1–3 months (Gentle rinse). | Never. Replacing this can crash your nitrogen cycle. |
| Chemical (Carbon, Purigen) | Removes odors, tannins, and medications. | N/A | Every 2–4 weeks (Once “full,” they stop working). |
How Your Filter Type Changes the Schedule
The Quick Reference table above is a solid baseline, but the type of filter you’re running changes how often you’ll actually need to touch it. More media volume generally means longer stretches between cleanings.
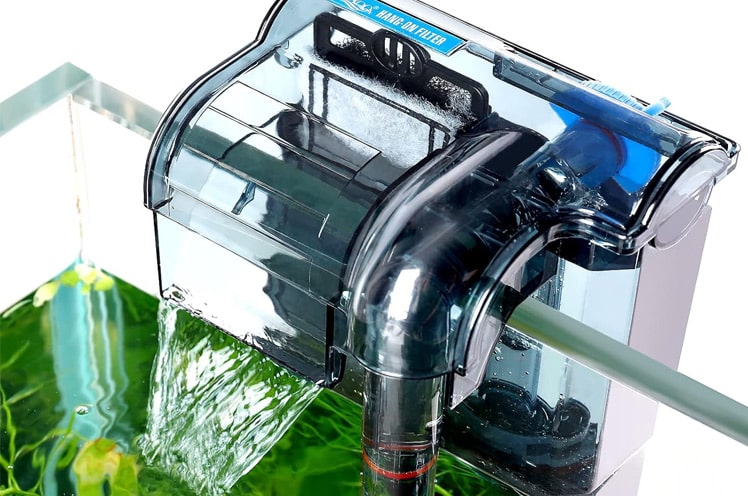
Hang-on-Back (HOB) Filters
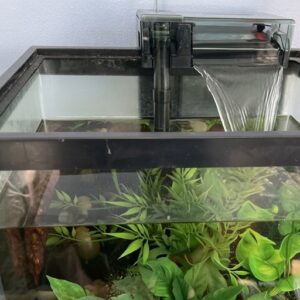
These are the most common setup, and also the ones that need the most frequent attention. Because the media basket is small, it clogs fast. Stick close to the 2-4 week mechanical cleaning window from the table above — in my experience, HOB filters are usually the ones where I notice flow slowing first.
Sponge Filters
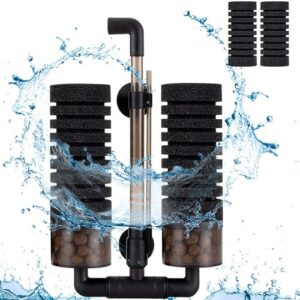
Sponge filters are almost entirely biological, so treat them more like the table’s Biological row than the Mechanical row. I rarely touch mine more than once every 1-2 months, and only ever with a gentle squeeze in old tank water — never a full scrub. These are workhorses for fry tanks and hospital setups precisely because you can leave them alone.
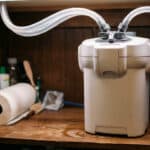
Canister Filters
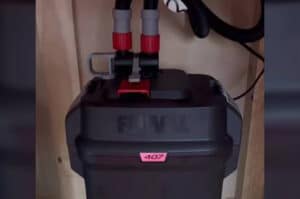
This is where the table’s 2-4 week window doesn’t really apply. Canister filters hold significantly more media and water volume than a HOB, so they take much longer to clog. In my experience, canisters can comfortably run 2-3 months between cleanings, sometimes longer on a lightly stocked tank. Opening one up every few weeks like you would a HOB is overkill and just disturbs the bacteria colony more often than necessary. I’ve got a whole guide on canister filters that can help you figure out if this type is a good fit for you.
Under-Gravel Filters (UGF)
These are less common these days, and I’ve never used one, but if you’re running one, the “media” is really your substrate itself. Vacuum lightly during routine water changes to prevent detritus buildup under the plates, but avoid a deep gravel clean all at once — you’d be disturbing the bacterial colony living throughout the entire bed, not just in one contained cartridge.
To sum this up: the smaller and more contained your filter’s media chamber, the more often it needs a cleaning. HOB and sponge filters run on the Quick Reference table’s timeline; canister filters can stretch it out considerably. If you’re not sure about your filter type, check out my Fish Tank Filter Guide for more information.
A Closer Look at Your Aquarium Filter Media
Mechanical Media (The “Trash Collector”)
Sponges and filter floss are your first line of defense. They get dirty fast because they are literally catching fish waste. You don’t need to buy new sponges every month; simply squeeze them out in a bucket of old tank water until the water runs relatively clear.
Not All Sponges Are the Same: Coarse vs. Fine
Here’s something the “just rinse it” advice usually skips: coarse and fine sponges do different jobs, and that changes how often each one actually needs attention.
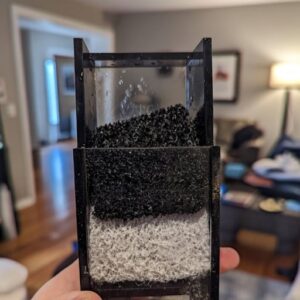
Coarse Sponges have large, open pores designed to trap bigger debris while letting water flow through easily. Because they don’t clog as fast, they double as great biological real estate — bacteria colonize the surface area readily, which is exactly why coarse sponges can go months, sometimes over a year, between anything more than a quick squeeze.
Fine sponges (or polishing pads) are doing a different job entirely — they’re built to catch the tiny particles the coarse sponge lets through, which means they clog up fast by design. If you’re running one, expect to rinse or swap it out at nearly every cleaning cycle, not on the same relaxed timeline as your coarse media. A fine pad that’s visibly grey or compacted isn’t a sign something’s wrong; it’s just doing exactly what it’s supposed to do.
The practical takeaway: if your filter uses both (many HOB and canister setups do), don’t apply one rule to both. Treat the coarse sponge like your biological media — hands off, infrequent rinses. Treat the fine polishing pad like disposable mechanical media — check it every time you clean, and don’t feel bad replacing it often, since that’s the point of having it.
Biological Media (The “Heart”)
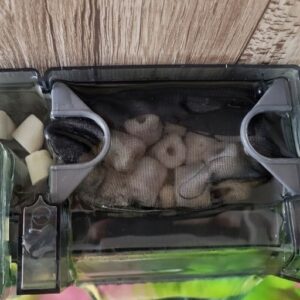
This is the most important part of your filter. Whether you use ceramic rings or premium options like Seachem Matrix, these porous stones house the bacteria that keep your fish alive. Never wash these in tap water, as the chlorine will kill your bacteria colony instantly.
How Often to Clean Bio Media Wheels
If your filter system utilizes a rotating biological wheel (like a Marineland Bio-Wheel), the maintenance logic changes completely.
The Only Maintenance: If the wheel stops spinning, the axle bearings are simply clogged with mineral scale or sludge. Take the wheel out, gently swish it in a bucket of old tank water, wipe the plastic intake tracks with a clean paper towel, and place it back.
The Timeline: You should never change or aggressively scrub a bio-wheel. The brown discoloration on the pleats isn’t dirt—it is the living biological engine of your tank.
Chemical Media (The “Polisher”)
Activated carbon is great for removing that “fishy” smell or yellow tint in the water, but its pores fill up quickly. If you want a more sustainable option, many hobbyists switch to Seachem Purigen, which can be “recharged” and reused, saving you money on replacements.
If you need a new filter and housing setup, check out my post on the best aquarium filters.
How to Clean Your Fish Tank Filter Without Crashing the Cycle
The goal of cleaning your filter isn’t to make it look brand new — it’s to remove the sludge so water can flow freely again. Scrub it too clean, and you’ll wipe out the beneficial bacteria along with it, which can trigger an ammonia spike within days. Instead of cleaning on a fixed calendar, I use my eyes: when the flow out of my filter starts to slow down, that’s my signal it’s time.
Follow these five steps to keep your tank safe.
Step 1: The Bucket Rule
During your regular water change — roughly every 2 to 4 weeks, or sooner if flow has slowed — fill a small bucket with water straight from the aquarium. Never use tap water. The chlorine and chloramines in tap water are designed to kill bacteria, which is exactly what you’re trying to protect in your filter.
Step 2: Disconnect and Disassemble
Unplug your filter and bring the media basket or cartridges over to your bucket of tank water. If you have a HOB (Hang-on-Back) filter, this is also a good time to check the intake tube for any stuck leaves or debris that could be restricting flow.
Step 3: The Swish and Squeeze
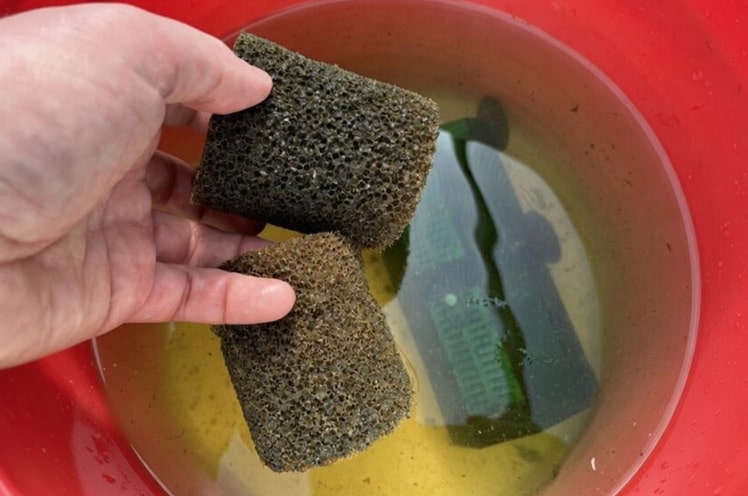
Take your mechanical media — sponges or foam — and give them a few good squeezes in the bucket of tank water. The water will get dirty fast; that’s a good sign. Keep squeezing until the sponge no longer feels clogged.
If your filter uses disposable cartridges, don’t throw them away yet. Rinse them the same way you would a sponge. The cartridge frame and floss can usually survive several rinses before they actually need replacing — it’s really only the carbon inside that has a true expiration date.
Step 4: Gentle Rinse for Bio-Media
If you have ceramic rings or bio-balls, simply swish them around in the bucket to knock off the heaviest gunk. Unlike your mechanical media, bio-media doesn’t need this every cleaning — once every 1-3 months is enough, so feel free to skip this step on the cleanings in between.
Step 5: Reassemble and Boost
Put everything back in the filter. If you had to replace a sponge because it was falling apart, or you’re worried you cleaned a little too thoroughly, this is the perfect time to add a dose of beneficial bacteria like FritzZyme 7 or API Quick Start. Think of it as an insurance policy that keeps your cycle stable while things settle back in.
Signs You Actually Need to Replace Your Fish Tank Filter Media
Your media won’t last forever — here’s how to tell when it’s time to stop cleaning and start replacing.
1. The Sponge is Falling Apart
Mechanical sponges are durable, but after a year or two of squeezing, they lose their spring. If a sponge feels slimy even after a rinse, or starts crumbling into bits of foam in the tank, replace it.
2. The Water Flow is Weak
If you’ve deep-cleaned the sponges and checked the intake tube but water is still barely trickling out, the internal pores are likely permanently clogged. This restricts oxygen to your bacteria and can eventually burn out the motor.
3. Your Chemical Media is Full
Unlike sponges, activated carbon and Seachem Purigen work by soaking up toxins. Once those microscopic pores fill up, they stop working. Why do manufacturers typically say to replace it every 2-4 weeks? Activated carbon works through adsorption — it has a finite number of microscopic pores that trap dissolved organics, and once those pores fill up, the carbon becomes biologically inert rather than harmful. Most manufacturers list somewhere in the 2-4 week range as the point where pore saturation typically occurs under normal aquarium bio-loads, though heavily stocked tanks can exhaust it faster.
- Carbon: Replace every 2–4 weeks. If your water turns yellow or develops a smell, it’s exhausted.
- Purigen: Replace or recharge once it turns deep brown or black.
4. The Ceramic Rings are Crumbling
High-quality bio-media like Seachem Matrix or ceramic rings can last for years. If they start breaking down into dust or pebbles, they lose the surface area bacteria need to live on. Replace these gradually — never all at once.
How to Actually Confirm Your Chemical Media Is Exhausted
The 2-4 week window is a solid guideline, but it’s still a guess — your bio-load, tank size, and what you’re filtering for all affect how fast that carbon or Purigen actually saturates. If you want a real answer instead of a calendar reminder, here’s how to check:
Watch for the return of what the filter was removing
Chemical media doesn’t fail silently — it fails by letting the problem it was solving come back. If you added carbon for a yellow tint or a smell, and that tint or smell returns before your next scheduled swap, the media is spent early, regardless of what the calendar says.
Test your water instead of guessing
If you’re removing something testable — ammonia, phosphate, or medication residue — a test kit will tell you definitively whether your chemical media is still doing its job. I’ve already broken down which kits are actually accurate enough to trust for this in my test kit accuracy comparison, so if you’re serious about dialing this in rather than eyeballing it, that’s the place to start.
Check for a color or texture change
Purigen is the easiest example — it visibly darkens from clear/off-white to deep brown or black as it saturates, which is a genuine visual cue you can rely on. Carbon doesn’t give you the same obvious tell, which is exactly why the “watch for symptoms to return” and “test the water” methods above matter more for carbon specifically.
The bottom line: the 2-4 week rule is a safe default if you’d rather not think about it, but if your tank is heavily stocked, or you’re using chemical media for a specific problem, testing or watching for the symptom’s return will tell you the truth faster than the calendar will.
The Golden Rule of Replacing Media: The “Seed” Method
If you must replace your biological media or a large sponge, never throw the old one away immediately. The old media is covered in the “seeds” of your bacterial colony. To prevent a cycle crash:
- Place the new media inside the filter next to the old media.
- Let them run together for at least 2–3 weeks.
- This allows the bacteria to “jump” from the old material to the new material.
- After 2 to 3 weeks, you can safely remove the old piece.
See my guide on the best filters for your aquarium and learn all the ins and outs of keeping your water clean.
How Often to Change Fish Tank Filter Media FAQs
Can I wash my filter media in tap water if I’m quick?
No. Even a quick rinse in tap water can expose your beneficial bacteria to enough chlorine to kill a significant portion of the colony. Always use a container of de-chlorinated aquarium water.
How do I know if my filter is too dirty?
The best indicator is the water flow. If the water returning to the tank has slowed to a trickle, or if you see water bypassing the media and flowing over the top of the filter intake, it’s time for a swish and squeeze in a bucket of tank water.
Should I change the filter if my fish is sick?
Actually, keeping your filter stable is more important when a fish is sick. However, if you used medication to treat the tank, you should replace your Activated Carbon after the treatment is finished, as the carbon will soak up the medicine and prevent it from working if left in too long.
What happens if I accidentally throw away my old filter?
Don’t panic, but monitor your water daily. Add a bacterial starter (like FritzZyme 7) and perform small, frequent water changes (10–20%) for the next two weeks to keep ammonia levels down while new bacteria grow on your new media.
My filter has two cartridges; should I change both at once?
Never. If your filter uses dual cartridges or multiple sponges, only clean or replace one at a time. This ensures that the established bacteria on the old half can immediately colonize the new half, preventing any dangerous ammonia spikes.
Does a stinky filter mean it needs to be replaced?
Not necessarily. A healthy filter should have an earthy or pond-like smell. If it smells like rotten eggs or sulfur, you likely have dead spots where waste is trapped without oxygen. Rinse the media thoroughly in tank water to remove the buildup, but don’t toss the media unless it’s physically falling apart.
Why does the box say to change the cartridge every 2–4 weeks?
This is a common point of frustration in the hobby. Manufacturers recommend frequent replacements to ensure the activated carbon inside stays fresh and, frankly, to encourage repeat sales. For the health of your fish, it is better to prioritize the biological bacteria on the mesh/sponge rather than the carbon inside.
Should I clean my filter and do a water change on the same day?
While many people do this for convenience, it’s actually safer to stagger them. Your beneficial bacteria live in both the filter and the substrate. By cleaning the filter one week and vacuuming the gravel the next, you ensure you never remove too much of your bio-load at one time.
Can I use a regular kitchen sponge as a replacement filter?
No! Many kitchen sponges are treated with anti-mildew chemicals or detergents that are toxic to fish. Always use sponges specifically labeled as aquarium-safe or unconditioned coarse foam to ensure no chemicals leach into your water.
The Final Wrap-Up: Maintenance Over Replacement
The logic of filter maintenance is about preservation, not replacement. In my 15 years, the #1 cause of “unexplained” fish death I see is a beginner “cleaning” their tank so thoroughly that they wipe out their beneficial bacteria. Your filter isn’t just a trash can for fish waste; it’s a living organ.
Remember the pattern from this guide: mechanical media gets rinsed every 2-4 weeks, biological media gets left alone for 1-3 months at a time, and chemical media is really the only thing on a hard clock — replace that every 2-4 weeks and let everything else earn its keep. Mixing those schedules up is usually where a healthy tank turns into an ammonia emergency.
In my 50-gallon community, I might rinse my sponges once every two months since it’s lightly stocked. In my nano setups, it’s even less frequent. The goal is to keep the water moving, not to make the filter media look “brand new.” If you follow the AquaLogic rule of rinsing media in dechlorinated tank water and only replacing it when the sponge literally starts to fall apart, your water will stay clearer, and your fish will stay safer. Stop buying into the “disposable” culture of big-box pet stores and start treating your filtration like the biological powerhouse it is.
As always, for any questions or comments, drop them in the box down below or send me a message on the contact page.

I founded AquaLogicHQ to share hands-on, tested strategies that come from 3-month algae battles and countless hours perfecting the nitrogen cycle. My mission is simple: I've made most of the mistakes on my four active tanks and am sharing the answers so you can avoid disaster in yours. When I’m not elbows-deep in a water change, I’m putting the latest hobby gear through its paces to see if it actually delivers.
- Best Canister Filters For Fish Tanks: What I’d Actually Buy for a Big Tank - July 26, 2026
- The Best Nano Aquarium Tanks I’ve Actually Run in My Fish Room - July 19, 2026
- The Best Fish Tank Heaters: Ranked and Sized for Your Setup - July 4, 2026