I think of a canister filter as the “graduate-level” piece of equipment in this hobby. It’s not something every tank needs, and if you’ve got a 10-gallon community tank, buying one is honestly overkill. But the moment you cross into serious bioload territory, like a 55-gallon community, a goldfish tank, or a tank full of hungry cichlids — a canister stops being a luxury and starts being the only tool actually built for the job.
After 15 years running everything from sponge filters in nano tanks to canisters humming quietly under my 50-gallon community, I’ve learned that most “best canister filter” lists miss the real question: it’s not which one is biggest; it’s which one actually matches your tank’s real-world flow needs once media and head height eat into that GPH number on the box. In this guide, I’m breaking down the canister filters I’d actually buy again, and the sizing math most retailers conveniently leave out.
If you haven’t decided on a filter type yet, start with my full filter guide — this post is a deep-dive specifically for canister filters once you know that’s the right call for your tank.
Canister Filters For Fish Tanks TLDR:
- Do You Even Need One? If your tank is under 40 gallons with a light-to-moderate bioload, skip it — a quality HOB like the AquaClear 50 or Seachem Tidal will do the job for a fraction of the price. Canisters start earning their cost at 40-75 gallons and become close to mandatory past 75 gallons or with heavy waste producers like goldfish and cichlids.
- The Sizing Mistake Almost Everyone Makes: The GPH rating on the box is measured with an empty filter and zero head height — real-world flow after media resistance and vertical lift typically runs 20-30% lower. Always size up one model from what the manufacturer recommends, or run your numbers through the calculator below.
- Best Overall (Mid-Range): Fluval 407 — the most customizable media stack of the group, with a real-world 5.2× turnover on a 55-gallon tank.
- Best for Heavy Bioload: Marineland Magniflow 400 — built for goldfish, large cichlids, or any tank over 75 gallons with serious waste output.
- Best for First-Time Canister Buyers: Aqueon QuietFlow 300 — pre-packed media and proprietary cartridges make it the easiest canister to start with, with a genuine water-clarity edge.
- Best Budget Pick: Penn-Plax Cascade 700 — solid value, but only if you size it for a 30-40 gallon tank rather than pushing it to its rated 65-gallon maximum.
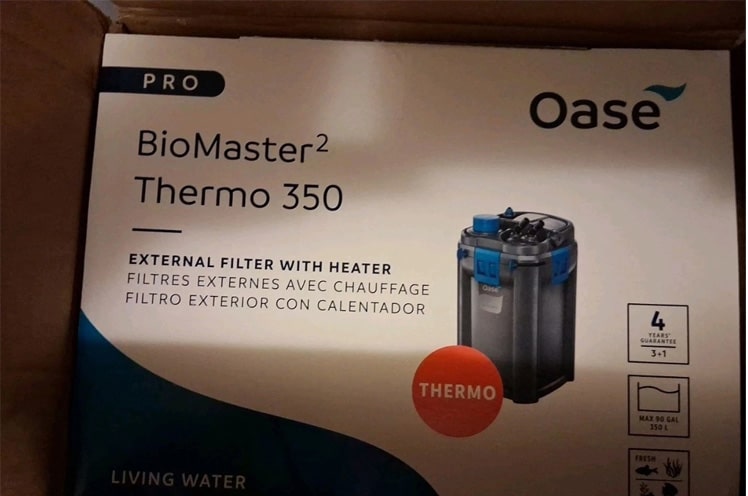
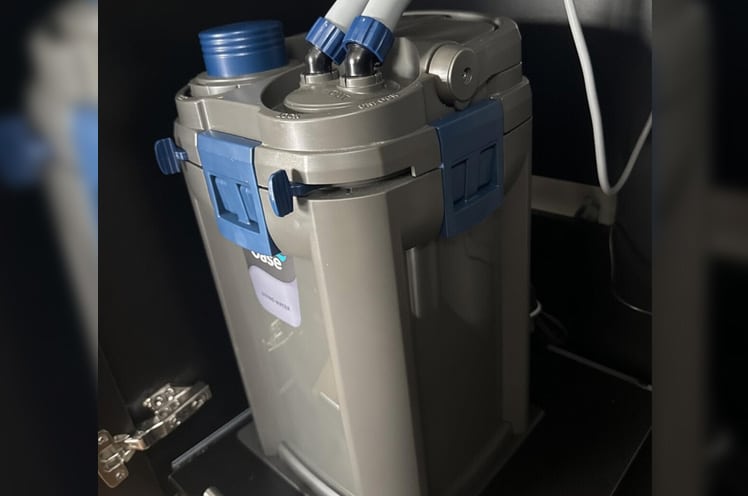
- Best Premium Pick: OASE BioMaster 2 Thermo 350 — a pull-rinse-replace pre-filter and a hidden heater chamber, built for aquascapers who want a clean display tank and don’t mind paying for the convenience.
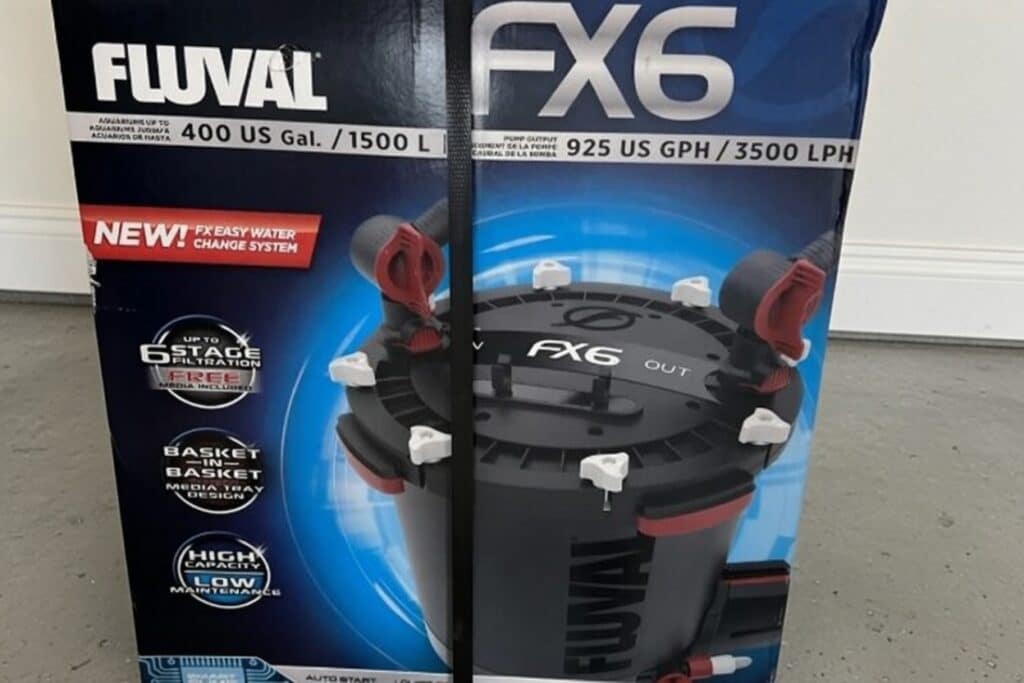
- Best for Monster Tanks: Fluval FX6 — engineered for 100+ gallon setups and heavy mess-makers like large goldfish, turtles, and cichlids, with Smart Pump Technology that self-purges trapped air every 12 hours. Real-world turnover lands around 3.4× on a 125-gallon tank.
Disclosure: AquaLogicHQ.com is a participant in the Amazon Services LLC Associates Program, as well as other affiliate programs, designed to provide a means for us to earn fees by linking to Amazon.com and affiliated sites at no extra cost to you. Please see the Affiliate Disclosure for more details.
| Product | Best For | Rated GPH | Tank Size | Price | |
|---|---|---|---|---|---|
| Fluval 307 | Mid-range community tanks | 303 GPH | Up to 70 gal | $229.00 | Check price |
| Marineland Magniflow 400 | Large heavy-bioload tanks | 400 GPH | Up to 100 gal | $220.00 | Check price |
| Aqueon QuietFlow 300 | First-time canister buyers | 300 GPH | Up to 75 gal | $210.00 | Check price |
| Penn-Plax Cascade 700 | Budget pick for 30–40 gal tanks | 185 GPH | Up to 65 gal | $185.00 | Check price |
| OASE BioMaster 2 Thermo 350 | Aquascapers & premium setups | 300 GPH | Up to 90 gal | $310.00 | Check price |
| Fluval FX6 | Heavy-Duty Monster Tanks | 925 GPH | Up to 400 gal | $400.00 | Check price |
Jump Down To Canister Filter Reviews
Do You Actually Need a Canister Filter?
My honest answer: probably not, unless your tank meets at least one of the thresholds below. I see beginners drop $200 on a canister for a 20-gallon community tank all the time — and while it won’t hurt anything, it’s solving a problem they don’t have yet.
Here’s how I see it:
Under 40 Gallons — Skip It
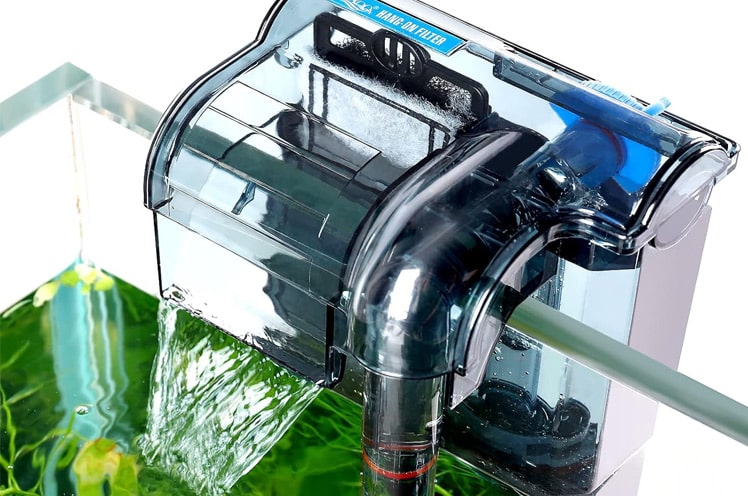
A quality hang-on-back filter like the AquaClear 50 or the Seachem Tidal handles this range without breaking a sweat. The water volume is small enough that a well-maintained HOB will keep your parameters rock-solid, and the maintenance is dramatically simpler. Save your money.
40–75 Gallons — Canister Starts Making Sense
This is the gray zone. A HOB can still manage a lightly stocked 55-gallon, but the moment you start adding messy eaters — cichlids, goldfish, large plecos — a canister’s superior mechanical and biological capacity starts earning its price tag. If you’re running a heavily planted setup in this range, the canister’s sealed, flow-adjustable design also gives you much better control over CO2 levels and surface agitation than a HOB ever will.
75+ Gallons or Heavy Bioload — Canister Is Close to Mandatory
At this size, a HOB filter is fighting a losing battle against the waste output of a fully stocked tank. You either run two HOBs (messy, redundant, noisy) or you run one well-sized canister that handles the entire biological, mechanical, and chemical filtration load quietly under the cabinet. This is the scenario canisters were genuinely built for.
The Special Cases
Tank size isn’t the only trigger. Even on a smaller tank, a canister makes sense if:
- You’re keeping goldfish, large cichlids, or any species known for high waste output — bioload matters more than gallon count.
- You’re running a CO2-injected planted tank and need precise control over surface agitation to prevent off-gassing.
- Noise is a real concern — a quality canister running under a cabinet is virtually silent in a way no HOB ever quite achieves.
- You want to run specialized media (phosphate remover, zeolite, Seachem Purigen) in large quantities without cramming it into a small HOB media basket.
If none of those apply to your setup right now, bookmark this guide and come back when they do. There’s nothing wrong with running a great HOB until your tank actually outgrows it — I did it for years. On the other hand, if you’re ready to make the switch, jump down to the Canister Filter Calculator and Review Section.
The Canister Filter Sizing Mistake Nobody Talks About
Here’s the number that trips up almost every first-time canister buyer: the GPH rating on the box is measured in a lab with an empty filter, zero media, and the outlet hose sitting at the same level as the pump. That number has almost nothing to do with the flow rate you’ll actually get once the filter is running in your living room.
In the real world, two things immediately eat into that rating the moment you set the filter up:
Head Height:
Head height is the vertical distance the pump has to push water upward from the filter body (sitting under your cabinet) to the outlet nozzle returning water to the tank. Every foot of vertical lift costs you flow. A canister rated at 265 GPH sitting 3 feet below the waterline is already losing a meaningful chunk of that number before a single gram of media goes inside it.
Media Resistance:
Once you load the filter with mechanical foam, biological ceramic rings, activated carbon, and any specialty media like phosphate remover or Seachem Purigen, the water has to force its way through all of that material. Each layer adds resistance, and resistance costs flow. A fully loaded canister running real media in a real tank typically delivers 20–30% less flow than its rated GPH.
What This Means in Practice:
The rule I follow: always size up one step from what the manufacturer recommends for your tank size. If the box says “rated for tanks up to 75 gallons” and you have a 55-gallon tank, that’s not as much headroom as it sounds — once media and head height take their cut, you may be running closer to a 40-gallon filter’s real-world output. Buying the filter rated for 100 gallons on a 55-gallon tank isn’t overkill. It’s just accounting for physics.
A simple way to think about it: take the rated GPH, subtract 25%, and that’s the number you should actually be planning around. If that number is still at least 4–5 times your tank volume per hour, you’re in good shape. If it isn’t, size up.
The Other Thing Nobody Puts on the Box: Media Capacity
GPH gets all the attention because it’s the one number printed in bold on the packaging, but it’s not actually the best predictor of how well a canister filter performs. A filter with a huge flow rate and tiny media baskets will get outperformed by a slightly slower filter packed with real biological surface area — every time.
Here’s why: flow rate only tells you how much water is moving through the filter. Media capacity tells you how much of that water actually gets cleaned as it passes through, and how large a bacterial colony your filter can support. A canister that blasts 400 GPH through a thin, half-empty media tray is just moving dirty water past your bacteria faster — it’s not necessarily removing more waste or processing more ammonia than a filter running at 250 GPH with baskets packed full of ceramic rings and sponge.
What to actually check before buying:
- Total media volume, not just basket count. Two stacked trays sound impressive until you realize each one is barely an inch deep.
- How much of that volume is genuinely usable for biological media once you’ve set aside room for mechanical and chemical stages.
- Whether the media baskets are fully customizable, or whether you’re locked into a proprietary cartridge that limits how much you can actually pack in.
The rule I follow: when two filters have similar real-world GPH after the 25% cut, I pick the one with more usable media volume, not the one with the higher number on the box. Flow rate gets you turnover. Media capacity is what actually keeps your water clean, and your bacteria colony large enough to handle a mistake — a missed water change, an overfeeding, a new fish added too soon.
Donny’s Real-World Rule:
“I never buy a canister filter rated for my tank size. I buy the one rated for the next size up. The box rating is a ceiling — your actual flow is always lower.”
A Real-World Canister Filter GPH Example:
Here’s exactly how I size a canister filter using my own 50-gallon community tank as the model:
Step 1 — Find the rated GPH:
The Fluval 407 is rated at 383 GPH on the box.Step 2 — Apply the 25% real-world cut:
383 GPH × 0.75 = 287 GPH actual flowStep 3 — Check your turnover rate:
287 GPH ÷ 50 gallons = 5.7x tank volume per hourThe general rule of thumb for a community freshwater tank is a minimum of 4–5x turnover per hour. At 5.7x, I’m comfortably inside that range even after media resistance and head height have taken their cut.
Now compare what happens if I’d bought the “right-sized” filter:
The Fluval 307 is rated at 303 GPH — sized by Fluval for tanks up to 70 gallons.
303 GPH × 0.75 = 227 GPH actual flow
227 GPH ÷ 50 gallons = 4.5x turnoverStill technically within range — but with zero margin left for a heavily stocked tank, a dirty media basket between cleanings, or a slightly longer hose run than average. That’s the difference one model size makes in practice.
The AqualogicHQ Canister Filter GPH Calculator
Canister Filter GPH Calculator
Enter your tank size and the filter’s rated GPH — get your real-world flow rate and turnover after media resistance.
My Top 6 Canister Fish Tank Filters:
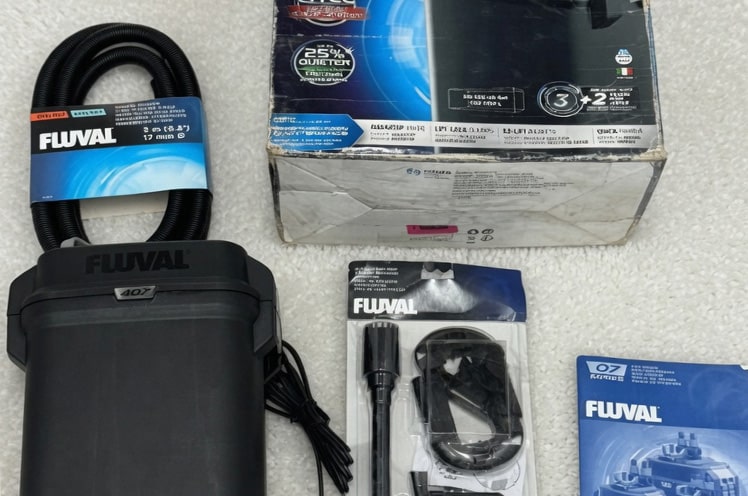
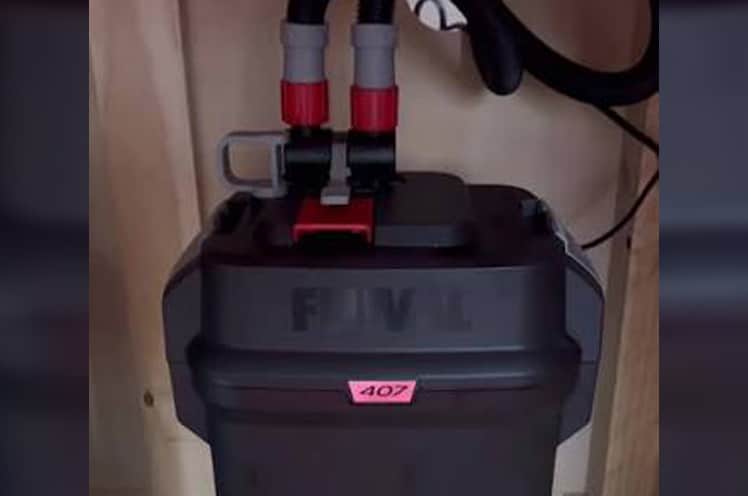
1. Fluval 407 Performance Canister Filter — Best Mid-Range Pick
Fluval’s 07 series is widely considered an industry workhorse, and after running the 407 on my own tank, I understand why. The vertical pre-filter cartridge design is the standout engineering choice here — it intercepts mechanical waste before it ever reaches your biological media, which means your ceramic rings and bio-media stay cleaner between deep maintenance sessions and your cycle stays more stable as a result.
What I Like About It:
The independent red locking clamps make opening the canister incredibly secure, and the AquaStop valve simultaneously cuts off both inlet and outlet flow with a single lever — the cleanest, least-messy disconnect mechanism I’ve used on any canister at this price point. It operates near-silently once primed, and the pre-filter surface area is genuinely massive for a filter in this class.
What I Don’t Like About It:
The ribbed hosing is functional but gathers detritus internally faster than smooth tubing, making it harder to flush clean during maintenance. The priming handle can also feel stiff out of the box — give it a few uses, and it loosens up, but first-timers sometimes think something is wrong.
What You Should Know Before Buying:
Rated for tanks up to 100 gallons at 383 GPH on the box — but run that through the calculator above and your real-world flow after media resistance lands closer to 287 GPH, giving you a 5.2× turnover on a 55-gallon tank. Comfortably within range for a community setup, but tighter than it looks on the spec sheet. The media basket is also fully customizable — stack mechanical, chemical, and biological media exactly how you prefer rather than being locked into a proprietary cartridge system.
- Cost: About $229.00
- 4.5 Stars (9,916 Amazon Reviews)
2. Marineland Magniflow 400 Canister Filter — Best for Large, Heavy-Bioload Tanks
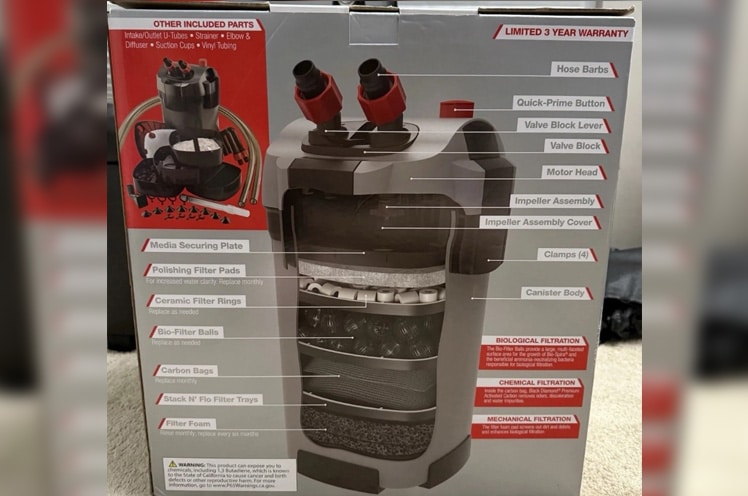
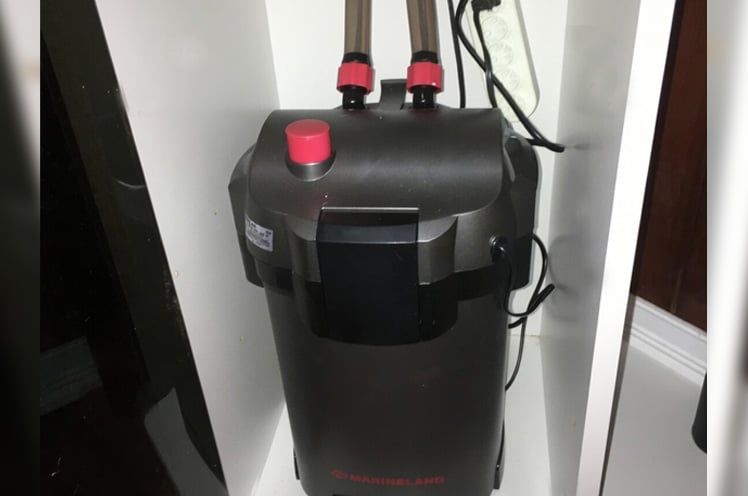
The Magniflow 400 is built for a specific job: serious water movement on large, heavily stocked tanks where most mid-range canisters start struggling. What sets it apart from the competition at this flow rate is its emphasis on preventing bypass leaks — the multi-stage water seal design forces every drop of water through the media stack rather than finding the path of least resistance around it. On a tank with a real bioload, that distinction matters more than the GPH number alone.
What I Like About It:
The stacked media baskets have genuinely impressive capacity for a filter in this class — plenty of room to run a full mechanical, biological, and chemical media stack without having to compromise on any layer. The top valve block’s single-lever quick disconnect is also one of the cleanest implementations I’ve seen: one motion seals both lines simultaneously, and the whole unit separates without a drip.
What I Don’t Like About It:
The biological media included out of the box is sparse for a filter this size — the trays have the volume to hold a serious bio-colony, but the stock ceramic rings don’t fill them out properly. Budget an extra $10–15 for additional ceramic rings or porous lava rock before you set it up, and load those trays properly from day one rather than letting the filter run half-empty on bio-media.
What You Should Know Before Buying:
Rated at 400 GPH for tanks up to 100 gallons — run that through the calculator above and your real-world flow after media resistance lands closer to 300 GPH, giving you a solid 3× turnover on a 100-gallon tank or a more comfortable 6× turnover on a 50-gallon. This is a filter genuinely built for the heavy-bioload scenario I described in Section 4 — goldfish, large cichlids, or any seriously stocked community over 75 gallons.
One practical note before buying:
The Magniflow 400 has a larger footprint than most canisters in this range. Measure your aquarium stand’s interior cabinet height and depth before ordering — clearance issues are the most common complaint from buyers who didn’t check first.
- Cost: About $220.00
- 4.1 Stars (4,104 Amazon Reviews)
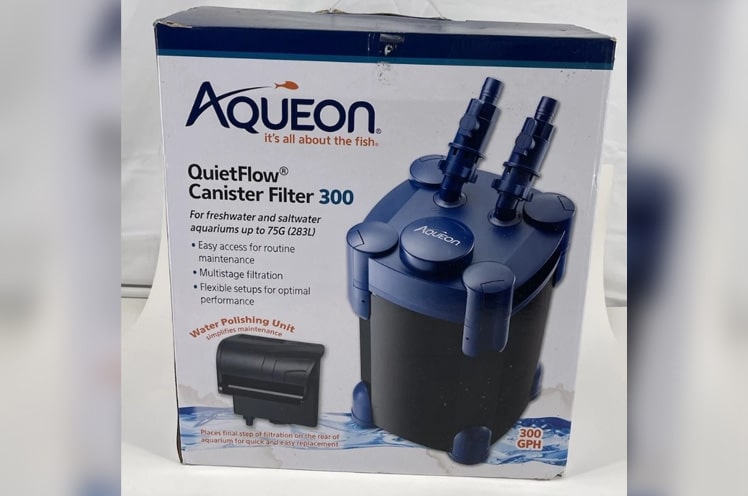
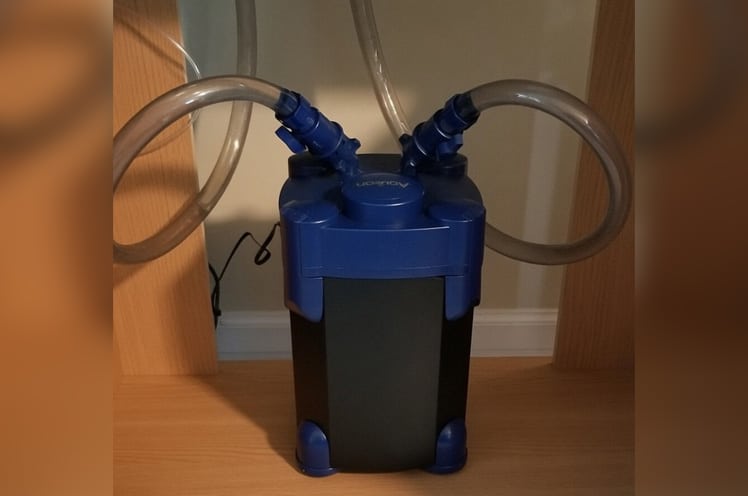
3. Aqueon QuietFlow 300 Canister Filter — Best for Beginners Intimidated by Canisters
Most canister filter guides assume you already know what you’re doing — Aqueon built the QuietFlow 300 for everyone else. Where the Fluval 307 and Marineland Magniflow reward hobbyists who want to dial in a custom media stack, the QuietFlow 300 takes the opposite approach: a pre-packed, plug-and-play setup that gets a first-time canister owner up and running without a steep learning curve. If you’ve been putting off making the jump from a HOB because canisters feel complicated, this is the one I’d start with.
What I Like About It:
Coming pre-packed with media out of the box is a genuinely underrated feature for a first canister — no hunting for ceramic rings, no figuring out layering order, no second-guessing your media stack before the first run. The proprietary carbon cartridges make routine replacement fast and foolproof: pull the old one, drop in the new one, done. True to its name, it also runs remarkably quietly — noticeably so even compared to other canisters in this class.
What I Don’t Like About It:
The proprietary drop-in cartridge system is a real trade-off once you outgrow the beginner stage. If you want to run a custom media stack — specific biological media, Seachem Purigen, a phosphate remover, or lava rock — you’re working against the design rather than with it. It’s doable with media bags, but it takes more effort than it should on a filter at this price point. Long-term, serious hobbyists tend to eventually outgrow this limitation and wish they’d bought a more customizable option from the start.
What You Should Know Before Buying:
Rated at 300 GPH for tanks up to 75 gallons — run that through the calculator above and your real-world flow after media resistance lands closer to 225 GPH, giving you a 3× turnover on a 75-gallon tank or a more comfortable 4.5× turnover on a 50-gallon. The built-in water polishing unit is the other standout feature worth understanding: it’s a fine mechanical filtration stage that catches micro-particles most standard media misses, which is why crystal-clear water is genuinely one of this filter’s strengths rather than just a marketing claim. If biological customization is your priority, look at the Fluval 307 instead. If clarity and simplicity are what you’re after, the QuietFlow 300 delivers both without asking much in return.
- Cost: About $210.00
- 4.4 Stars (1,017 Amazon Reviews)
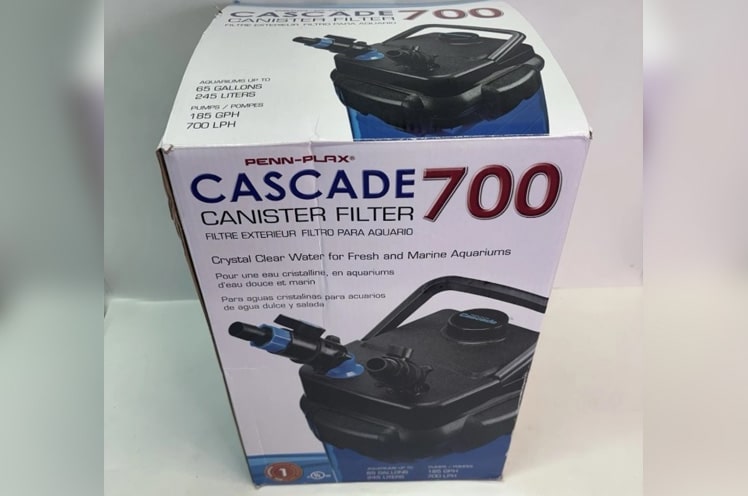
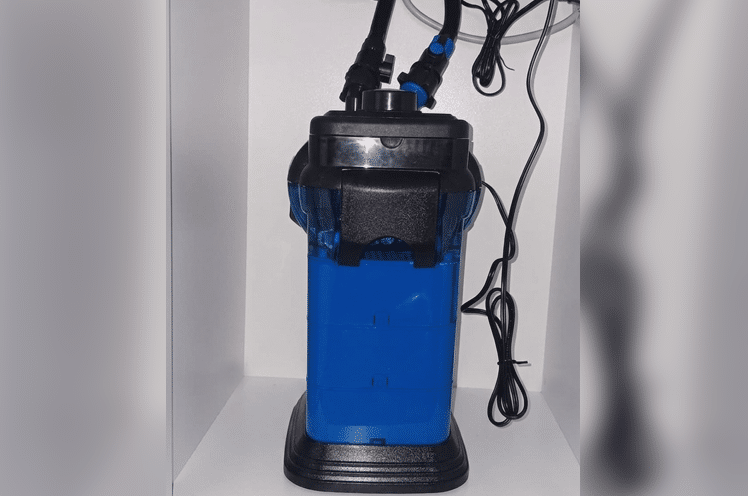
4. Penn-Plax Cascade 700 Canister Filter — Best Budget Pick
The Cascade 700 doesn’t pretend to be something it isn’t — and that honesty is exactly what makes it worth recommending. Penn-Plax built this filter around a proven, no-frills design that prioritizes durability and value over premium features, and for a hobbyist who wants canister-level filtration without canister-level pricing, it delivers that bargain more reliably than most of the competition at this price point. Just go in with clear expectations: this is the right tool for the right budget, not a Fluval at half the price.
What I Like About It:
The value-to-performance ratio here is genuinely hard to beat — the components feel solid and built to last, the blue canister housing looks clean and professional under a cabinet, and the 360-degree swivel hose connectors are a feature you’d expect on a filter twice the price. That swivel matters more than it sounds: under a tight aquarium stand with limited clearance, being able to rotate the hose connections freely instead of forcing them into a fixed angle is the difference between a clean install and a frustrating one.
What I Don’t Like About It:
The large push-button primer is the Cascade 700’s most common long-term complaint — and it’s a fair one. Over time, detritus works its way underneath the button mechanism and causes it to stick, requiring noticeably more effort to pump than it did out of the box. It’s not a dealbreaker, but it’s worth knowing before you buy. Keeping the intake strainer clean and rinsing the primer button area during your regular maintenance cycle slows the problem down considerably.
What You Should Know:
Rated at 185 GPH for tanks up to 65 gallons — but this is where the real-world GPH conversation matters most on a budget filter. Run it through the calculator above and your actual flow after media resistance drops to roughly 139 GPH. On a 65-gallon tank, that’s only a 2.1× turnover — well below the 4–5× minimum for a community setup. This is why I’d follow the manufacturer’s own implied guidance and down-rate it to 30–40-gallon tanks for a stocked community, where it delivers a much healthier 3.5–4.6× real-world turnover. At that tank size, it earns its price tag comfortably. Push it to its rated maximum on a heavily stocked 65-gallon, and you’ll be fighting your water quality rather than maintaining it.
- Cost: About $185.00
- 4.3 Stars (10,347 Amazon Reviews)
5. OASE BioMaster 2 Thermo 350 Canister Filter — Best Premium Pick for Aquascapers
OASE builds filtration equipment for the hobbyist who has already owned two or three canisters, knows exactly what frustrates them about the maintenance process, and is willing to pay to solve those problems permanently. The BioMaster 2 Thermo 350 is the answer to the two biggest quality-of-life complaints about canister ownership: messy, full-body teardowns every 8–12 weeks, and a cluttered display tank full of heaters, probes, and cables. If either of those describes your current setup, this filter was designed specifically for you.
What I Like About It:
The EasyClean pre-filter module is the single most useful canister innovation I’ve seen in years — you pull the mechanical sponge pre-filters straight out of the top of the unit without opening the main canister body, breaking the siphon loop, or getting water anywhere. On a standard canister, pre-filter maintenance means a full teardown. On the OASE, it’s a 60-second pull-rinse-replace that you can do mid-week without planning around it. The integrated Thermo heater chamber is equally well thought-out: your heater lives inside the filter body rather than hanging visibly inside the display tank, which gives aquascapers the clean, equipment-free look that’s otherwise only achievable with an external inline heater setup costing significantly more.
What I Don’t Like About It:
The premium engineering comes with a premium price tag — this is the most expensive filter on this list by a meaningful margin, and it’s worth being honest that the core filtration performance isn’t dramatically better than a well-maintained Fluval 307 at roughly half the price. What you’re paying for is convenience and aesthetics, not raw biological capacity. The factory pre-filter sponges are also very fine — effective at catching micro-particles, but they clog faster than coarser mechanical media and need rinsing more frequently than the 8–12 week interval I’d apply to a standard canister. Check them every 3–4 weeks until you know your tank’s specific detritus load.
What You Should Know Before Buying:
Rated at 300 GPH for tanks up to 90 gallons — run that through the calculator above and your real-world flow after media resistance lands closer to 225 GPH, giving you a 2.5× turnover on a 90-gallon tank or a more comfortable 4.5× turnover on a 50-gallon. For a lightly stocked aquascape — which is the primary audience for this filter — the 2.5× on a 90-gallon is workable since planted aquascapes typically carry a lighter bioload than a heavily stocked community tank. If you’re running a densely stocked 90-gallon, I’d size up to the BioMaster 2 Thermo 600 rather than stretching this model to its rated maximum. One more thing worth knowing: the integrated heater chamber uses a standard heater element that will eventually need replacing — factor that into the long-term ownership cost alongside the filter itself.
- Cost: About $310.00
- 4.7 Stars (134 Amazon Reviews)
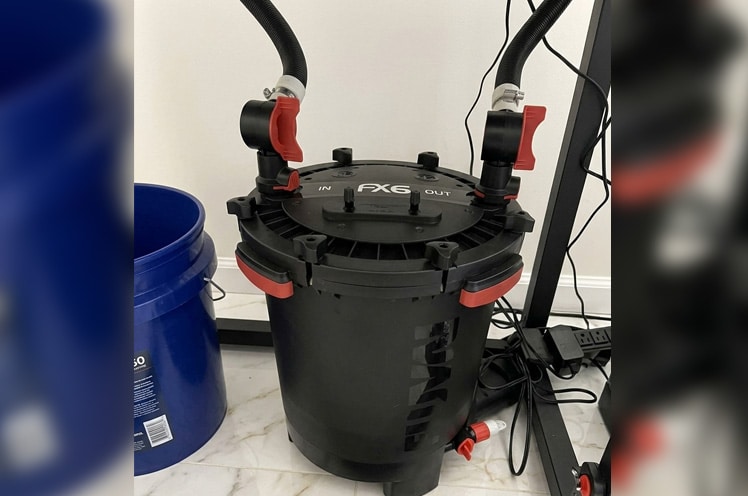
Fluval FX6 High Performance Canister Filter — Best Heavy-Duty Monster Tank Pick
When you jump up to monster tanks or massive bioloads, standard mid-range canisters simply run out of steam. That is where the Fluval FX6 comes in. I don’t personally run an FX6 on my own home setup, but I have set up and currently maintain one for a client that I have had for about 9 months now. Getting hands-on experience with it week after week has given me a real appreciation for why this filter is considered the king of heavy-duty filtration. It isn’t just a bigger canister; it is engineered like a miniature commercial filtration plant.
What I Like About It:
The raw processing capacity is incredible, but the Smart Pump Technology is where the engineering really shines. The built-in microchip constantly monitors pump speed and performance to maximize efficiency, and every 12 hours, the filter automatically shuts down for a minute to vent trapped air out of the system. That self-evacuating feature keeps the flow rate completely consistent without you ever having to bleed air manually. The multi-stage media baskets hold a staggering amount of media, and the bottom drain valve with a purge hose makes water changes and flushing out sludge from the bottom of the canister effortless without needing to drag the entire unit to a sink.
What I Don’t Like About It:
It is a massive unit, and it is heavy — especially when filled with water and media. Moving it around during a full deep-clean takes some real effort. It also uses heavy-duty 1-inch diameter ribbed hosing, which can be stiff and stubborn to route through tight cabinet openings during installation. Like other Fluval ribbed hoses, it can collect buildup over time, requiring extra effort to clean out thoroughly.
What You Should Know Before Buying:
Rated for aquariums up to 400 gallons with a pump output of 925 GPH (and a filter circulation rate of 563 GPH), this unit moves serious water. Applying the same 25% real-world cut I use throughout this guide, that 563 GPH circulation rate works out to roughly 422 GPH of actual flow. On a 125-gallon tank, that gives you a solid 3.4× turnover, and on a 90-gallon heavy-bioload setup, it delivers a strong 4.7× turnover. This is not a filter for a standard community 55-gallon tank — the flow will overpower smaller fish. It is explicitly designed for large setups, predator tanks, cichlids, or heavy mess-makers like large goldfish and turtles.
One practical note before buying:
The FX6 stands at nearly 21 inches tall and is quite wide. Double-check the interior dimensions and clearance of your aquarium cabinet before ordering, as it requires more height and depth than standard canister filters.
- Cost: About $400.00
- 4.6 Stars (3,438 Amazon Reviews)
Canister vs. HOB Filters: When to Actually Switch
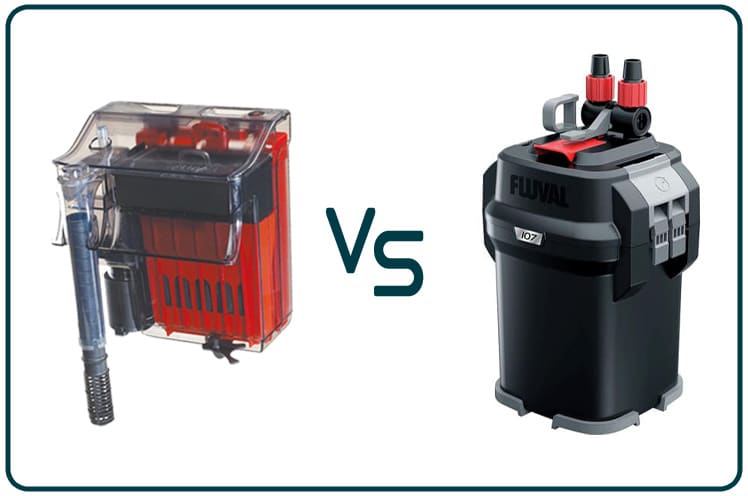
If you landed on this page still on the fence about whether you actually need a canister at all, this is the section for you. I cover the full breakdown of every filter type — sponge, HOB, canister, and internal — in my complete aquarium filter guide, but here’s the short version for readers deciding between a HOB and a canister specifically.
Stick with a HOB if:
- Your tank is under 40 gallons with a light-to-moderate fish load.
- You want dead-simple maintenance — pull the media basket, rinse in tank water, done.
- Budget is a real constraint — a quality HOB like the AquaClear 50 or Seachem Tidal runs $40–$65 and will outperform a cheap canister every time.
- You’re still learning the hobby and don’t want to troubleshoot priming issues or hose connections.
- Noise isn’t a concern — a well-maintained HOB is quiet enough for most rooms.
Switch to a canister if:
- You’ve crossed 40 gallons with a real fish load — not just “I could put 40 gallons in it,” but actually stocked.
- Your livestock are messy eaters — goldfish, large cichlids, big plecos, or anything that produces serious waste output.
- You’re running a CO2-injected planted tank and need to dial surface agitation down to near-zero to prevent off-gassing.
- Noise genuinely matters — a quality canister sitting under a cabinet is as close to silent as filtration gets
- You want to run large quantities of specialty media (phosphate remover, zeolite, Seachem Purigen) without cramming it into a small HOB basket.
The one situation where I’d run both:
A large, heavily stocked tank — think 75+ gallons with a serious community or a breeding setup — benefits from running a canister as the primary biological and chemical filter alongside a HOB handling mechanical pre-filtration. The HOB catches the big debris before it ever reaches the canister’s media, which means longer intervals between canister cleanings and a more stable cycle overall. It’s not overkill if the bioload justifies it — it’s just redundancy working in your favor.
Canister Filter Maintenance: How to Clean It Without Crashing Your Cycle
This is where most canister filter owners go wrong. The filter runs so quietly and so efficiently that it’s easy to forget it exists — until the flow slows to a trickle, you open it up, pull out a solid brick of compressed muck, and wonder how long it’s been that way.
The good news: Canister maintenance is straightforward once you know the sequence.
The bad news: Get the sequence wrong, and you’ll crash your cycle just as badly as if you’d thrown your filter media in the trash.
How Often to Clean a Canister Filter
As a general rule, plan on a full canister teardown every 8–12 weeks for a moderately stocked tank. Unlike a HOB where you can see the media getting clogged, a canister hides everything inside a sealed housing — so I use two triggers rather than a fixed calendar date:
- Flow rate drop. If the return flow from your spray bar or outlet nozzle has noticeably slowed compared to when the filter was clean, it’s time. Don’t wait until it’s a trickle.
- The 12-week ceiling. Even if flow still looks fine at 12 weeks, open it anyway. Canister media compresses and channels over time — water finds the path of least resistance through the media stack, which means you can have decent-looking flow and seriously degraded biological filtration happening simultaneously.
The Cleaning Sequence — Don’t Skip Steps
1. Unplug and close the inlet/outlet valves before disconnecting anything.
This sounds obvious, but skipping it means a lap full of tank water the moment you disconnect the hose.
2. Carry the canister to a sink or bucket before opening it.
Opening a loaded canister over your carpet is a one-time mistake most people only make once.
3. Drain the canister water into a bucket — save it.
You’re going to rinse your media in this water, not tap water. Chlorine kills beneficial bacteria on contact. Even a quick rinse under the tap can wipe out a meaningful portion of your biological colony and trigger a mini-cycle.
4. Clean mechanical media first, biological media second.
Squeeze and rinse your coarse mechanical foam in the saved tank water until it runs mostly clear. Then give your biological media (ceramic rings, bio-balls, or lava rock) a gentle swish in the same water — just enough to knock off the heaviest detritus without disturbing the thin brown biofilm coating the surfaces. That biofilm is your bacteria colony. Leave as much of it intact as possible.
5. Replace activated carbon if it’s been more than 4–6 weeks.
Carbon exhausts its adsorption capacity over time and stops doing anything useful — unlike your biological media, it genuinely needs replacement rather than rinsing. If you’re running specialty media like Seachem Purigen or a phosphate remover, check the manufacturer’s guidance — Purigen can be recharged with bleach solution, which changes the process significantly.
6. Inspect the impeller and O-ring before reassembling.
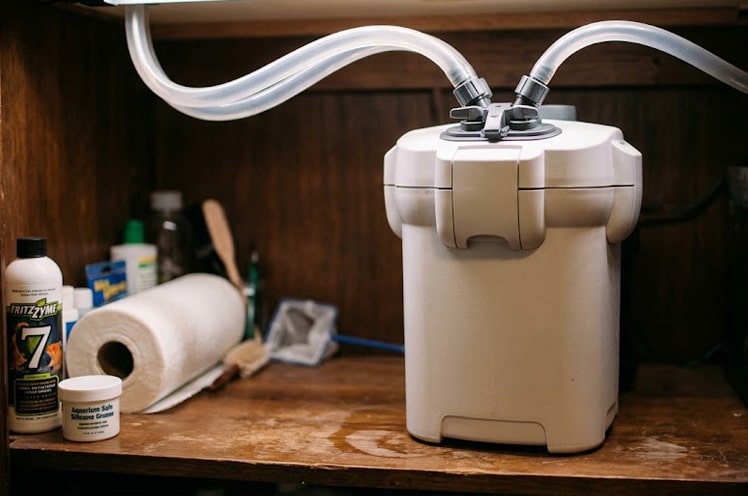
The impeller is the small magnetic spinning component that drives the entire pump. Pull it out, wipe the shaft clean, and check for cracks or debris wrapped around the blades — a damaged or dirty impeller is the most common cause of noise and reduced flow on an otherwise healthy canister. While you’re in there, run a thin layer of aquarium-safe silicone grease on the O-ring that seals the canister lid. A dry O-ring is how you end up with a slow leak under your cabinet that you don’t notice until the floor is wet.
7. Prime before restarting.
Most modern canisters have a self-priming button or lever — use it until you feel resistance before plugging back in. Running the pump dry even briefly can damage the impeller or overheat the motor.
After Cleaning: Add a Bacterial Boost
Even with a careful rinse in tank water, a thorough canister cleaning removes some bacterial mass. I always add a dose of FritzZyme 7 or Seachem Stability directly into the canister’s inlet after reassembly as insurance — it helps the colony recover faster and prevents the mini ammonia spike that can follow a deep clean on a heavily stocked tank. Check out my post on the best starter bacteria for some helpful tips.
The One Rule That Overrides Everything Else
Never clean your canister and do a large water change on the same day. Both actions reduce your bacterial population — your filter media houses a significant colony, and your substrate houses another. Doing both at once is the fastest way to trigger an ammonia spike in an otherwise healthy, established tank. Clean the filter one week, vacuum the gravel the next. Stagger them, every time.
Donny’s Maintenance Routine (50-Gallon Community Tank)
I started running my Fluval 407 on my 55-gallon again because my daughter has grown up a bit and doesn’t pull on the hoses any more and clean it every 10 weeks on average. Sometimes I’ll stretch it out to 12 weeks if flow is still strong. I do my water change on a Sunday, and if the canister is due, I wait until the following Wednesday to open it. Takes about 20 minutes start to finish once you’ve done it a few times. The first one always takes longer because you’re figuring out your valve sequence — after that it’s just routine.
Frequently Asked Questions
Do I need a canister filter for a planted tank?
Not necessarily — but a canister is often the best choice for a serious planted setup, especially if you’re injecting CO2. The sealed design lets you dial surface agitation down to near-zero, which prevents CO2 from off-gassing before your plants can use it. A HOB’s waterfall return constantly breaks the surface and bleeds CO2 into the atmosphere, which is exactly what you’re trying to avoid in a high-tech planted tank. For a low-tech, non-CO2 planted setup, a quality HOB works perfectly fine.
Can I run a canister filter and a HOB at the same time?
Yes, and on a large or heavily stocked tank I’d actively recommend it. Run the canister as your primary biological and chemical filter, and let the HOB handle mechanical pre-filtration — catching the big debris before it ever reaches your canister media. This extends the time between canister cleanings significantly and gives you genuine redundancy if one filter needs maintenance.
How loud is a canister filter compared to a HOB?
A properly primed, well-maintained canister sitting under a cabinet is virtually silent — noticeably quieter than even a good HOB. The noise difference is one of the most underrated reasons to switch. The caveat: a canister with a dirty or damaged impeller, a partial air lock, or a kinked hose can become surprisingly loud. If your canister suddenly starts making noise it didn’t before, check the impeller first — it’s the culprit nine times out of ten.
Do canister filters work for reef and saltwater tanks?
They can, but they’re not the preferred choice in the reef hobby. The concern is nutrient export — a canister’s sealed, oxygen-poor environment can become a nitrate factory if the mechanical media isn’t cleaned frequently enough. Most reef keepers prefer a sump-based setup for better gas exchange and easier maintenance access. That said, a canister running quality chemical media like Rowaphos GFO or activated carbon can absolutely play a supporting role in a reef system alongside a sump.
How long does a canister filter last?
A quality canister from a reputable brand — Fluval, Eheim, Oase — should last 10 years or more with proper maintenance. The impeller and O-ring are the two wear components most likely to need replacement over that lifespan, and both are cheap, readily available parts. Cheap, off-brand canisters are a different story — I’ve seen them fail within a year. On a tank large enough to justify a canister, this isn’t the place to save money.
Can I use a canister filter on a tank under 20 gallons?
Technically yes, but it’s not recommended. The flow rate on even a small canister is often too strong for a nano tank’s water volume — you end up with a whirlpool instead of gentle circulation, which stresses fish and uproots plants. A sponge filter or a quality HOB is a far better fit under 20 gallons. If you’re running a nano setup specifically, my nano aquarium tank guide covers the right filtration options for small tanks in detail.
Why is my canister filter making a gurgling noise?
Almost always an air lock — a pocket of air trapped somewhere in the hose or filter body that the pump is struggling to push through. The fix: turn the filter off, give the canister body a gentle rock side to side to dislodge the air pocket, then re-prime and restart. If the gurgling comes back repeatedly, check that your inlet hose doesn’t have any upward bends where air can collect — hoses should run in a smooth, downward path from the tank to the filter inlet.
How do I know when my canister filter media needs replacing vs. just cleaning?
Your biological media (ceramic rings, bio-balls, lava rock) should never need full replacement unless it’s physically crumbling or you’re rebuilding the tank from scratch. Just rinse it in saved tank water every 8–12 weeks and leave the biofilm intact. Your mechanical foam will eventually compress and lose its structure after 12–18 months of use — when it stops bouncing back after a squeeze, replace it. Activated carbon needs swapping every 4–6 weeks since it exhausts its adsorption capacity and stops doing anything useful after that window.
The Bottom Line on Canister Filters:
A canister filter is the right tool for a specific job — not an upgrade every tank needs. Under 40 gallons with a light fish load, a quality HOB will serve you just as well for a fraction of the price. But once you cross into serious bioload territory — heavily stocked communities, goldfish, CO2-injected planted tanks, anything over 75 gallons — a canister stops being optional.
Two things to remember before you buy: the GPH on the box is a ceiling, not a promise, so size up one model and use the calculator above to confirm your real-world turnover. And the maintenance sequence matters as much as the filter itself — clean it every 8–12 weeks in saved tank water, stagger it away from your water change day, and add a bacterial boost after every deep clean.
If you haven’t picked a filter type yet, start with my complete aquarium filter guide before committing to a canister specifically. Running a smaller setup? My nano aquarium tank guide covers the right filtration options for tanks under 15 gallons.

I founded AquaLogicHQ to share hands-on, tested strategies that come from 3-month algae battles and countless hours perfecting the nitrogen cycle. My mission is simple: I've made most of the mistakes on my four active tanks and am sharing the answers so you can avoid disaster in yours. When I’m not elbows-deep in a water change, I’m putting the latest hobby gear through its paces to see if it actually delivers.
- Best Canister Filters For Fish Tanks: What I’d Actually Buy for a Big Tank - July 26, 2026
- The Best Nano Aquarium Tanks I’ve Actually Run in My Fish Room - July 19, 2026
- The Best Fish Tank Heaters: Ranked and Sized for Your Setup - July 4, 2026