
Updated 20 June 2026
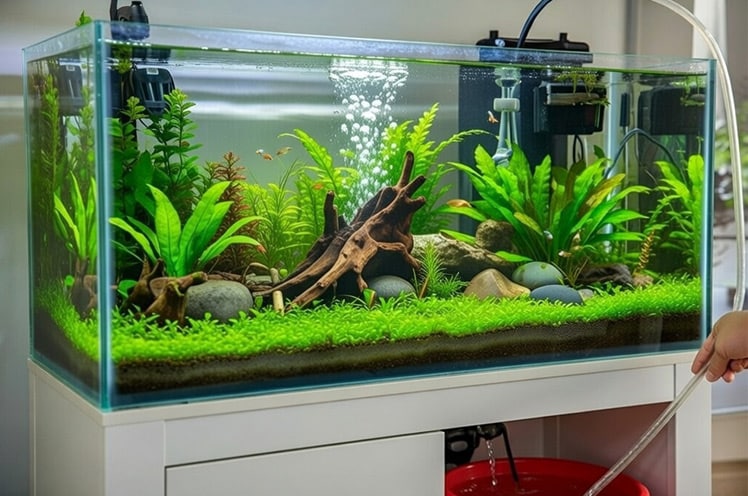
I believe your time is better spent enjoying your fish than carrying heavy buckets. If you’re still using the old-school manual siphon and a prayer to drain your 50-gallon community tank, you’re doing it the hard way — the right water change pump for aquarium use turns that 2-hour chore into a 20-minute routine. After 15 years in the hobby and thousands of gallons moved, I’ve refined a logical, “no-spill” system built around it. In this guide, I’m sharing the specific pumps I use to move water with military precision across my fish room.
Aquarium Water Change Pump Fast Facts:
- Safety First: Always unplug your heaters and filter pumps before draining. If a heater glass element runs dry, rapid temperature changes create internal stress that can fracture glass instantly — which is exactly what happens when cool refill water hits a hot, dry element.
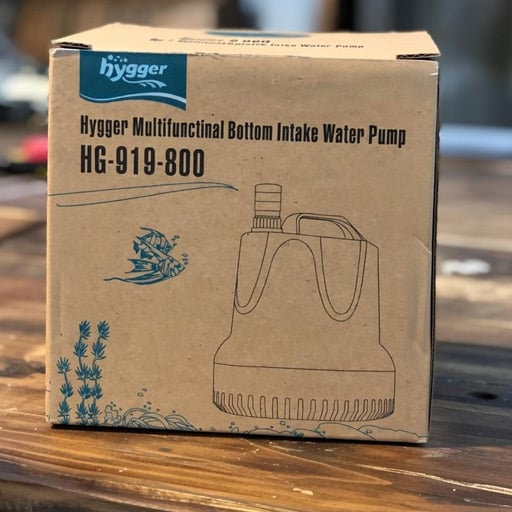
- Best Electric Submersible: Hygger Bottom Intake Pump (sucks water down to the last half-inch without losing its prime — ideal for dumping into nearby drains or yard bins).
- Best Bucket-Free System: Python No-Spill Clean & Fill (uses your sink faucet’s natural water pressure to create a vacuum siphon — perfect for filling and draining without hauling water).
- The “Head Height” Rule: Ignore flat-surface GPH. Always choose a pump with a “Max Head” rating that is at least double the vertical height of your aquarium stand.
- Pro Veteran Tip: Never use the cheap plastic faucet adapters that come with sink-style siphons. Spend an extra $10 on a brass faucet adapter so you don’t strip your sink’s threads.
| Pump | Best For | Price | |
|---|---|---|---|
| Hygger Bottom Intake Electric Submersible |
Draining into a sink, drain, or yard | $19.99–$38.99 | Check price |
| Python No-Spill Clean & Fill Sink-to-Tank |
Bucket-free drain and refill via faucet | $50–$130 | Check price |
Disclosure: AquaLogicHQ.com is a participant in the Amazon Services LLC Associates Program, as well as other affiliate programs, designed to provide a means for us to earn fees by linking to Amazon.com and affiliated sites at no extra cost to you. Please see the Affiliate Disclosure for more details.
The Simple Math of Water Changes:
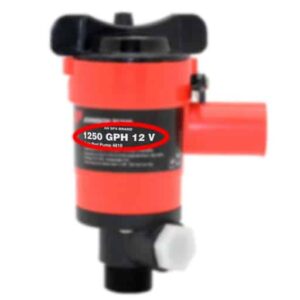
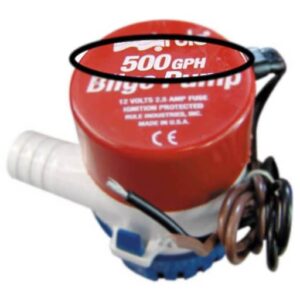
Don’t Buy an Underpowered Pump! When you look at a pump, you’ll see a number followed by GPH (Gallons Per Hour). Here’s the truth: that number is a flat-out lie for most of us. It only holds up if the pump is moving water across a flat surface — not up through a hose, over the rim of a sink, or out a window, which is what “Head Height” actually means. If you’re pumping water from a bucket on the floor up into a 20-gallon long on a high stand, a cheap pump will stall before it gets there. You need a pump that can fight gravity, so I always choose one rated for at least double the vertical height of my tank stand.
The 50% Rule: I always assume a pump will lose about 50% of its power once it has to push water through 20 feet of hose and up over the rim of a sink.
My Recommendation: For a 20-gallon tank, you want a pump rated for at least 250–300 GPH. For my 50-gallon community tank, I won’t touch anything under 400–500 GPH. Anything less, and you’ll be standing there long enough to watch your fish grow old while the tank drains down.
A “Stress-Free” Formula: I aim for a 5-minute drain. If you’re doing a 25% water change on a 40-gallon tank, you’re moving 10 gallons. To move 10 gallons in 5 minutes, you need a real-world flow of 2 gallons per minute — that’s 120 GPH. Accounting for the 50% Head Height loss, you actually want a pump rated closer to 240 GPH to hit that 5-minute mark comfortably.
Quick Tip: If you buy a pump that is too powerful for a small tank, you’ll create a whirlpool that stresses your fish. If you have a nano tank, you might want to try a small battery-operated pump or a manual siphon. Save the high-GPH beasts for the bigger tanks.
Choosing an Electric Aquarium Water Change Pump
Before you buy a pump, you need to decide which “Level of Laziness” you’re aiming for. There are two ways to get water out of your tank without ever picking up a bucket.
Level 1: The Submersible Pump. You still use a bucket or use a long hose to a nearby drain, but the pump does the heavy lifting. You drop it in the tank, and the work is done quickly.
This is Best For: People who want to drain water into a laundry sink or a garden, or those who use a ‘mixing bin’ for their new water. I use a submersible pump mostly for my 50-gallon community tank. I have used it for my 20-gallon long, but don’t ever use it in any tank smaller than 20 gallons.
Level 2: The ‘Sink-to-Tank’ (Python Style). No buckets needed. This bit of gear attaches directly to your faucet and uses your home’s water pressure to create a vacuum.
This is Best For: Anyone with a tank under 20 gallons who has a threaded faucet nearby. This is how I handle my 20-gallon long breeder tank and nano tank.
My Picks For Best Aquarium Water Change Pump
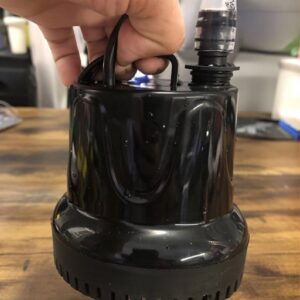
The Best Submersible Pump for Aquarium Draining: The Hygger Bottom Intake
My Thoughts: Most pumps have the intake on the side. That means when the water level drops halfway, the pump starts sucking air and stops. The Hygger sucks water from the bottom.
My Experience: I can drain my 20-gallon breeder down to the last half-inch of water without the pump ever losing its prime. It’s a beast for the price.
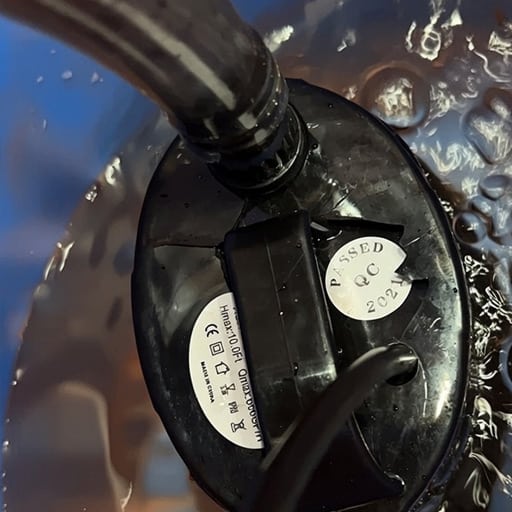

Quick tip: I really like this pump a lot, but the plastic fittings that come with it are garbage. For the 2 pumps I have, I have replaced the plastic fittings with brass ones. By replacing the fittings with brass, you’ll be able to use this pump a lot longer.
Cost: From $19.99 for the 215 GPH up to $38.99 for the 1060 GPH model.
4.3 Stars (2,013 Reviews).
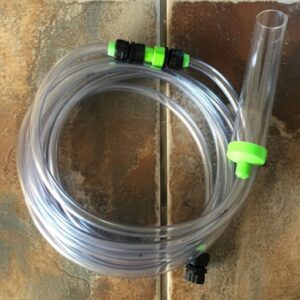
The Python No-Spill Clean & Fill
My Opinion: If you have a tank under 20 gallons, this is a requirement, not an option. The setup is almost insultingly simple — most owners have it threaded onto the faucet and running within 5 minutes, no tools required. That ease is the actual point: once a water change stops requiring buckets, you stop finding excuses to skip it. It’s not just my tank, either — owners running this on tanks as large as 55 gallons report getting a full water change done in about 15 minutes, with weekly maintenance dropping to roughly 10 minutes once the routine is dialed in. The gravel attachment earns its keep too, since it’s lifting waste out of the substrate while it drains, not just emptying the tank.
The “Hidden” Cost: The kit comes with a plastic faucet adapter. Don’t use it. It will strip your faucet threads within a month. I recommend spending the extra $15 to buy the Brass Faucet Adapter. The problem I have with the Python style is that you have to have your faucet running. If wasted water is a problem for you, get a submersible pump.

How I Use It: I use the 50-foot version. I can drain my tank directly into the kitchen sink and then flip a switch to fill it right back up with fairly close to temperature-matched water.
Cost: From $50 for the 25ft model up to $130.00 for the 100ft model.
4.5 Stars (8,091 Reviews).
How to Use a Submersible Transfer Pump for Filling Your Aquarium
If you choose a submersible electric pump over a Python siphon, you can still fill your tank completely bucket-free — with one underrated bonus: total control over the water before it ever touches your tank.
The Setup: Place a large plastic storage bin or trash can near your sink. Fill it with a mix of hot and cold tap water until it’s close to your tank’s temperature, using the same “wrist test” warmth check from the workflow above, then stir in your Seachem Prime dechlorinator and let it sit for a minute.
The Transfer: Drop the Hygger pump directly into the bottom of the clean water bin. Because it pulls from the bottom instead of the side, it keeps working all the way down to the last inch or two of the bin — you won’t end up with a few stranded gallons you can’t reach, the same advantage that makes it good at draining your tank in the first place. Attach your vinyl transfer hose, run it to your tank, and plug it in.
The Logic: This is the safest way to prepare water for sensitive fish rooms, because the water is fully treated and temperature-matched before it ever touches your ecosystem — no guessing at the faucet, no risk of shocking your fish with water that’s too cold or too hot.
Donny’s 5-Step “Dry Floor” Water Change Workflow
Setting up the pump is easy, but if you don’t follow these steps, you’ll end up with a puddle on your rug. Here is how I do it on my 50-gallon community tank.
Step 1: The “Hose Anchor” Check
Before you even plug the pump in, check your discharge point (the sink or the bucket).
Quick Tip: Water pressure can make a hose “kick” like a firehose. If you just rest the hose in a sink, it will jump out and soak your floor the second you turn the pump on. I use a plastic spring clamp or a Velcro strap to anchor the hose to the faucet or the side of the bucket.
Step 2: The “Submerge & Shake” (Priming)
If you’re using a submersible pump, don’t just drop it in and flip the switch.
The Secret: Sometimes air gets trapped in the impeller. Drop the pump in the tank, give it a good, quick shake under the water to let the air bubbles out, and then plug it in. If you hear a loud grinding sound, it’s just air—unplug it, shake it again, and start it up again.
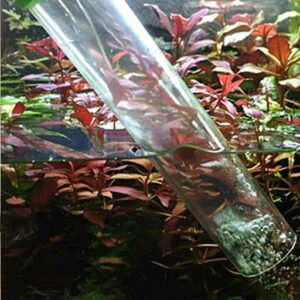
Step 3: Vacuuming the “Dead Zones”
Once the water is flowing, use the intake (or a gravel vac attachment on a Python) to hit the corners of the tank where waste settles.
The Best Move For Big Tanks: I aim for the areas behind my driftwood and rocks where the filter flow is weakest. This is where the nitrates hide. Keep an eye on your fish—if they get too curious, move the intake away!
Submersible Pump Limitations: Keep in mind that a standard submersible electric pump is designed to transfer water quickly, not to suck up debris. Never shove a submersible pump’s intake directly into your sand or gravel, or you will destroy the impeller motor. If you want to clean your substrate, use a manual gravel vacuum or a Python system to lift the waste before running your electric transfer pump.
Step 4: The Temperature Match (The “Wrist Test”)
This is where people mess up refilling.
My Method: Before I flip the valve to fill the tank back up from the sink, I let the water run over my wrist until it feels close to the temp of your tank’s water. If you want to be precise, hold a digital thermometer under the tap. You want to be within 2°F of your tank.
The Additive Rule: I add my dechlorinator directly into the tank before the new water starts flowing in. This ensures the chlorine is neutralized the second it hits the tank. I prefer Seachem Prime to dechlorinate the new tank water.
Step 5: The “Slow Roll” Refill
Don’t blast the water back in at 100% speed. Pumping water in too fast can kick up your substrate and cloud the tank. I aim the hose at the front glass or a large rock to disperse the pressure. Once the tank is full, unplug the pump, drain the excess water out of the hose, and coil it up. Done in about 10 minutes.

Best Pump for Aquarium Water Changes FAQs
Setup & Compatibility
What if my kitchen faucet doesn’t have threads for a Python?
This is a common headache with modern pull-down spray faucets. Usually, the aerator (the little screen at the tip) unscrews to reveal threads, but pull-down faucets often use a non-standard size.
My Workaround: If your kitchen sink won’t cooperate, check your bathroom sink or the laundry tub. Most bathroom sinks use a standard thread that fits a $5 adapter from the hardware store. If all else fails, stick with a submersible pump and a long hose that reaches the nearest bathtub drain.
Safety & Technique
Do I need to turn off my heater and filter during a water change?
YES. This is a safety rule I never break. If your water level drops below your heater, the glass can overheat and shatter when the cold refill water hits it. If your filter runs dry, you risk burning out the motor.
My Routine: I plug my heater and filter into the same power strip. One flick of the switch kills the power to everything. I do my 10-minute water change, and then flick it back on. Simple. See my post on how a good filter and regular pump-assisted water changes work together.
Will a high-powered pump suck up my fish or my gravel?
It absolutely can if you aren’t careful, but it depends which system you’re using. A submersible electric pump like the Hygger should never go directly into your gravel; the suction is strong enough to damage the impeller. For substrate cleaning, use a manual gravel vacuum or the gravel tube attachment that comes with a Python-style siphon — the wider tube slows the water down just enough to lift the dirt but let the heavy gravel fall back down.
A Safe Fish Tip: If you have small, curious fish (like Neons), I wrap a small piece of coarse filter sponge or a mesh bag around the pump intake. This keeps the fish safe while still letting the water get sucked.
Special Tanks & Long-Term Care
How do I handle water changes for a delicate Nano/Betta tank?
You have to be much more careful with small and delicate fish and tanks than you are with a large 50-gallon community aquarium.
The Small Tank Method: Never use a high-powered electric pump to drain or refill a 5-gallon tank. The pressure is too high and will blow your Betta around like he’s in a hurricane. I still use a manual siphon for the drain (it only takes 60 seconds), and for the refill, I use a small pitcher to pour the water onto a floating saucer or my hand to break the fall. It keeps the substrate in place and Maximus’s fins safe.
Why does my pump feel like it’s losing power after a few months?
It’s almost always bio-slime. Just like your filter, the inside of your pump gets a coating of slippery muck.
A Quick Fix: Most water change pumps have a front cover that snaps off. Pull it off, take out the little magnetic fan (the impeller), and wipe it clean with a paper towel. It’ll run like new again.
Check out these popular posts:
- How to lower ammonia quickly.
- How to easily lower aquarium pH.
- How to Make Fish Tank Water Clear Easily
- Why does my fish tank water stink?
- How to lower nitrates in your aquarium.
Conclusion: Best Pump for Aquarium Water Changes
The logic of upgrading to a dedicated water change pump is simple: it makes you a better fishkeeper. When water changes are a back-breaking chore, you find excuses to skip them. When they are as easy as flipping a switch, you stay on top of your nitrates and minerals like a pro.
In my 15 years, the single best investment I made for my 50-gallon community wasn’t a fancy light or a rare fish—it was a high-GPH utility pump and 50 feet of vinyl tubing. It removed the friction from my maintenance routine. Don’t be a hero with a bucket; be a veteran with a plan. Invest in a pump that matches your tank’s volume and height, and you’ll never look back at a manual siphon again.
If you’re looking at your specific faucet or a weird tank stand and aren’t sure which setup will work, drop a comment below! Tell me how far your tank is from the nearest sink, and I’ll help you “math out” the best pump for your situation.
Keep your floors dry and your fish happy!

I founded AquaLogicHQ to share hands-on, tested strategies that come from 3-month algae battles and countless hours perfecting the nitrogen cycle. My mission is simple: I've made most of the mistakes on my four active tanks and am sharing the answers so you can avoid disaster in yours. When I’m not elbows-deep in a water change, I’m putting the latest hobby gear through its paces to see if it actually delivers.
- Best Canister Filters For Fish Tanks: What I’d Actually Buy for a Big Tank - July 26, 2026
- The Best Nano Aquarium Tanks I’ve Actually Run in My Fish Room - July 19, 2026
- The Best Fish Tank Heaters: Ranked and Sized for Your Setup - July 4, 2026


